Laravel 5.6 CRUD Tutorial With Example
Laravel 5.6 CRUD Tutorial is today’s leading topic. Laravel is a free, open-source PHP web framework.It follows MVC(Model View Controller) Architecture. Laravel is recognized as one of the most popular PHP frameworks. Bug fix releases 5.6 on February 7, 2018.Laravel become the first ever back-end framework to pass 40,000 stars on Github.In this tutorial, I will illustrate simple insert, update and delete application in Laravel 5.6 project. You have to just follow below step to create CRUD application in Laravel.I have listed the features of Laravel 5.6.
1)Logging Improvements
2)Single Server Task Scheduling
3)New Blade Directives
4)Bootstrap
5)API Controller Generation
6)Argon2 Password Hashing
7)UUID Methods
8)Dynamic Rate Limiting
9)Broadcast Channel Classes
10)Eloquent Date Casting
Laravel 5.6 CRUD Tutorial
We are going to make a simple system in which, we can register for the passport. It is a simpleLaravel 5.6 crud application for starters. No big deal at all.
Step 1: Configure Laravel 5.6 Project.
Install the brand new Laravel Project by the typing following command.
composer create-project --prefer-dist laravel/laravel passportappointmentsystemStep 2: Setup a MySQL database in .env file.
Now, configure the database in the .env file.
DB_CONNECTION=mysql
DB_HOST=127.0.0.1
DB_PORT=3306
DB_DATABASE=passportsystem
DB_USERNAME=root
DB_PASSWORD=
I have set up local database credentials.
Next, migrate two tables provided by Laravel 5.6 Switch to your terminal and hit the following command.
php artisan migrate
It will build two tables in your database.
- users
- password_resets
Step 3: Construct a model, migration file and controller for our Passports table.
Type the following command in your terminal.
php artisan make:model Passport -m
It will create two files.
- Passport.php model.
- create_passports_table migration file.
We need to create Schema for the passports table. So navigate to Laravel >> database >> migrations >> create_passports_table.
// create_passports_table
 public function up()
    {
        Schema::create('passports', function (Blueprint $table) {
            $table->increments('id');
            $table->string('name');
            $table->integer('date');
            $table->string('email')->unique();
            $table->integer('number');
            $table->string('office');
            $table->string('filename');
            $table->timestamps();
        });
    }
Now, migrate the table by the following command.
php artisan migrate
In the database, you can see the passports table.
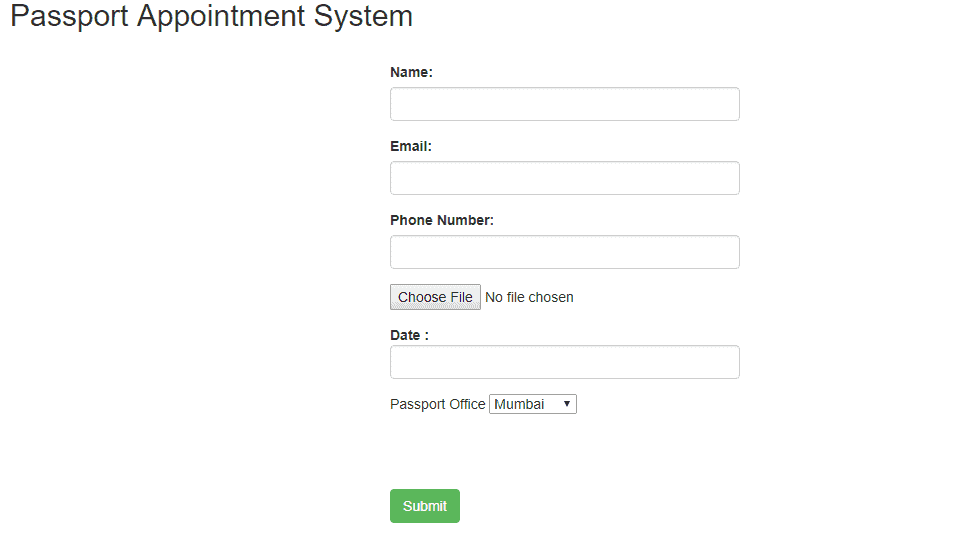
Step 4: Build view file to add the Information in the database.
Create a file in the resources >> views >> create.blade.php and put the following code in it.
<!-- create.blade.php -->

<!DOCTYPE html>
<html>
  <head>
    <meta charset="utf-8">
    <title>Laravel 5.6 CRUD Tutorial With Example  </title>
    <link rel="stylesheet" href="{{asset('css/app.css')}}">
    <link href="https://maxcdn.bootstrapcdn.com/bootstrap/3.3.6/css/bootstrap.min.css" rel="stylesheet">
    <link href="https://cdnjs.cloudflare.com/ajax/libs/bootstrap-datepicker/1.5.0/css/bootstrap-datepicker.css" rel="stylesheet">
    <script src="http://ajax.googleapis.com/ajax/libs/jquery/1.9.1/jquery.js"></script>
    <script src="https://maxcdn.bootstrapcdn.com/bootstrap/3.3.6/js/bootstrap.min.js"></script>
    <script src="https://cdnjs.cloudflare.com/ajax/libs/bootstrap-datepicker/1.5.0/js/bootstrap-datepicker.js"></script>
  </head>
  <body>
    <div class="container">
      <h2>Passport Appointment System</h2><br/>
      <form method="post" action="{{url('passports')}}" enctype="multipart/form-data">
        @csrf
        <div class="row">
          <div class="col-md-4"></div>
          <div class="form-group col-md-4">
            <label for="Name">Name:</label>
            <input type="text" class="form-control" name="name">
          </div>
        </div>
        <div class="row">
          <div class="col-md-4"></div>
            <div class="form-group col-md-4">
              <label for="Email">Email:</label>
              <input type="text" class="form-control" name="email">
            </div>
          </div>
        <div class="row">
          <div class="col-md-4"></div>
            <div class="form-group col-md-4">
              <label for="Number">Phone Number:</label>
              <input type="text" class="form-control" name="number">
            </div>
          </div>
        <div class="row">
          <div class="col-md-4"></div>
          <div class="form-group col-md-4">
            <input type="file" name="filename">
         </div>
        </div>
        <div class="row">
          <div class="col-md-4"></div>
          <div class="form-group col-md-4">
            <strong>Date : </strong>
            <input class="date form-control"  type="text" id="datepicker" name="date">
         </div>
        </div>
         <div class="row">
          <div class="col-md-4"></div>
            <div class="form-group col-md-4">
                <lable>Passport Office</lable>
                <select name="office">
                  <option value="Mumbai">Mumbai</option>
                  <option value="Chennai">Chennai</option>
                  <option value="Delhi">Delhi</option>
                  <option value="Bangalore">Bangalore</option>
                </select>
            </div>
        </div>
        <div class="row">
          <div class="col-md-4"></div>
          <div class="form-group col-md-4" style="margin-top:60px">
            <button type="submit" class="btn btn-success">Submit</button>
          </div>
        </div>
      </form>
    </div>
    <script type="text/javascript">
        $('#datepicker').datepicker({
            autoclose: true,
            format: 'dd-mm-yyyy'
         });
    </script>
  </body>
</html>
Step 5: Create one controller and route
php artisan make:controller PassportController --resource
It will create one controller file called PassportController.php and It has all the CRUD Functions, we need to inquire.
we register one route in routes >> web.php file. So let us do it.
// web.php

Route::resource('passports','PassportController');
Now, turn to your terminal and type the next command.
php artisan route:list
Next step would be to go to PassportController.php file and add into create() function some code.
// PassportController.php

  /**
     * Show the form for creating a new resource.
     *
     * @return \Illuminate\Http\Response
     */
    public function create()
    {
        return view('create');
    }
After that, we need to begin Laravel Development server. So in the terminal, follow the following command.
php artisan serve
Move to the browser and hit this URL: http://localhost:8000/passports/create
Step 6: Save Data into Database.
We require coding the store function in sequence to store the data in the database.
//PassportController.php
/**
     * Store a newly created resource in storage.
     *
     * @param  \Illuminate\Http\Request  $request
     * @return \Illuminate\Http\Response
     */
    public function store(Request $request)
    {
        if($request->hasfile('filename'))
         {
            $file = $request->file('filename');
            $name=time().$file->getClientOriginalName();
            $file->move(public_path().'/images/', $name);
         }
        $passport= new \App\Passport;
        $passport->name=$request->get('name');
        $passport->email=$request->get('email');
        $passport->number=$request->get('number');
        $date=date_create($request->get('date'));
        $format = date_format($date,"Y-m-d");
        $passport->date = strtotime($format);
        $passport->office=$request->get('office');
        $passport->filename=$name;
        $passport->save();

        return redirect('passports')->with('success', 'Information has been added');
    }
Step 7: Make an index page to list the Information.
For that, front, we need to forward the data to the index.blade.php. So, in PassportController.php file, we need to write the code to retrieve the data and return it to the index view.
//PassportController.php

public function index()
    {
        $passports=\App\Passport::all();
        return view('index',compact('passports'));
    }
In resources >> views produce individual blade file called index.blade.php file and placed the subsequent code in it.
<!-- index.blade.php -->

<!DOCTYPE html>
<html>
  <head>
    <meta charset="utf-8">
    <title>Index Page</title>
    <link rel="stylesheet" href="{{asset('css/app.css')}}">
  </head>
  <body>
    <div class="container">
    <br />
    @if (\Session::has('success'))
      <div class="alert alert-success">
        <p>{{ \Session::get('success') }}</p>
      </div><br />
     @endif
    <table class="table table-striped">
    <thead>
      <tr>
        <th>ID</th>
        <th>Name</th>
        <th>Date</th>
        <th>Email</th>
        <th>Phone Number</th>
        <th>Passport Office</th>
        <th colspan="2">Action</th>
      </tr>
    </thead>
    <tbody>

      @foreach($passports as $passport)
      @php
        $date=date('Y-m-d', $passport['date']);
        @endphp
      <tr>
        <td>{{$passport['id']}}</td>
        <td>{{$passport['name']}}</td>
        <td>{{$date}}</td>
        <td>{{$passport['email']}}</td>
        <td>{{$passport['number']}}</td>
        <td>{{$passport['office']}}</td>

        <td><a href="{{action('PassportController@edit', $passport['id'])}}" class="btn btn-warning">Edit</a></td>
        <td>
          <form action="{{action('PassportController@destroy', $passport['id'])}}" method="post">
            @csrf
            <input name="_method" type="hidden" value="DELETE">
            <button class="btn btn-danger" type="submit">Delete</button>
          </form>
        </td>
      </tr>
      @endforeach
    </tbody>
  </table>
  </div>
  </body>
</html>
So, when you type the URL: http://localhost:8000/passports

Step 8: Build an edit view for updating the Information.
Our step will be to join the edit function in PassportController.php file and set the following code in it.
//PassportController.php

 /**
     * Show the form for editing the specified resource.
     *
     * @param  int  $id
     * @return \Illuminate\Http\Response
     */
    public function edit($id)
    {
        $passport = \App\Passport::find($id);
        return view('edit',compact('passport','id'));
    }
Now, make an edit.blade.php file inside resources >> views
<!-- edit.blade.php -->
<!DOCTYPE html>
<html>
  <head>
    <meta charset="utf-8">
    <title>Laravel 5.6 CRUD Tutorial With Example </title>
    <link rel="stylesheet" href="{{asset('css/app.css')}}">
  </head>
  <body>
    <div class="container">
      <h2>Edit A Form</h2><br  />
        <form method="post" action="{{action('PassportController@update', $id)}}">
        @csrf
        <input name="_method" type="hidden" value="PATCH">
        <div class="row">
          <div class="col-md-4"></div>
          <div class="form-group col-md-4">
            <label for="name">Name:</label>
            <input type="text" class="form-control" name="name" value="{{$passport->name}}">
          </div>
        </div>
        <div class="row">
          <div class="col-md-4"></div>
            <div class="form-group col-md-4">
              <label for="email">Email</label>
              <input type="text" class="form-control" name="email" value="{{$passport->email}}">
            </div>
          </div>
        <div class="row">
          <div class="col-md-4"></div>
            <div class="form-group col-md-4">
              <label for="number">Phone Number:</label>
              <input type="text" class="form-control" name="number" value="{{$passport->number}}">
            </div>
          </div>
        <div class="row">
          <div class="col-md-4"></div>
            <div class="form-group col-md-4" style="margin-left:38px">
                <lable>Passport Office</lable>
                <select name="office">
                  <option value="Mumbai"  @if($passport->office=="Mumbai") selected @endif>Mumbai</option>
                  <option value="Chennai"  @if($passport->office=="Chennai") selected @endif>Chennai</option>
                  <option value="Delhi" @if($passport->office=="Delhi") selected @endif>Delhi</option>
                  <option value="Bangalore" @if($passport->office=="Bangalore") selected @endif>Bangalore</option>
                </select>
            </div>
        </div>
        <div class="row">
          <div class="col-md-4"></div>
          <div class="form-group col-md-4" style="margin-top:60px">
            <button type="submit" class="btn btn-success" style="margin-left:38px">Update</button>
          </div>
        </div>
      </form>
    </div>
  </body>
</html>
Next step would be to code the update function. I have not updated the following fields.
- Date
- Image
If you are taking this tutorial, then this is the task for you to complete this. I need you to complete this update module on yourself.
//PassportCpntroller.php

/**
     * Update the specified resource in storage.
     *
     * @param  \Illuminate\Http\Request  $request
     * @param  int  $id
     * @return \Illuminate\Http\Response
     */
    public function update(Request $request, $id)
    {
        $passport= \App\Passport::find($id);
        $passport->name=$request->get('name');
        $passport->email=$request->get('email');
        $passport->number=$request->get('number');
        $passport->office=$request->get('office');
        $passport->save();
        return redirect('passports');
    }
Step 9: Remove the Information.
//PassportController.php
/**
     * Remove the specified resource from storage.
     *
     * @param  int  $id
     * @return \Illuminate\Http\Response
     */
    public function destroy($id)
    {
        $passport = \App\Passport::find($id);
        $passport->delete();
        return redirect('passports')->with('success','Information has been  deleted');
    }
Finally, Our Laravel 5.6 CRUD Tutorial is over. Thanks for taking.


Commentaires
Enregistrer un commentaire